In just a few short weeks, I’ll be back in Costa Rica running our May workshops. (Yeah!) So, it’s probably not too much of a surprise that visions of rainforests have been sneaking into my thoughts with increasing regularity.
At the forefront of those musings is one of my favorite species, squirrel monkeys. Now, before you click away with the idea that this article may not apply to you, just give me a chance. Although squirrel monkeys are the topic of this article, many of the techniques apply to pretty much any animal you find loitering about in trees. So, even if you aren’t planning a visit to Central America anytime soon, I think you’ll still find some value here.
Of the four different species of monkeys you can find in Costa Rica – howler, white-faced, spider, and squirrel – I think the little squirrel monkeys are my personal favorite. In fact, if it wasn’t wildly illegal, I’m sure one would find it’s way into my carry-on at some point.
I remember when I saw a troop of them for the first time. We had actually just finished up with an incredibly photogenic three-toed sloth and were bouncing down a rutty dirt road heading back to the resort. It was warm (as always), and a cacophony of insect and bird calls drifted through the open windows. As we made our way down, popping through potholes and partially sliding here and there, I was thinking about how productive our first day was. Too bad it was coming to an end already – or was it?
That’s when our (seemingly supernaturally) sharp-eyed guide, Dennis, spotted this troop of squirrel monkeys passing through in the trees above! For me, it was love at first sight. These little monkeys were cuter than a box full of kittens.
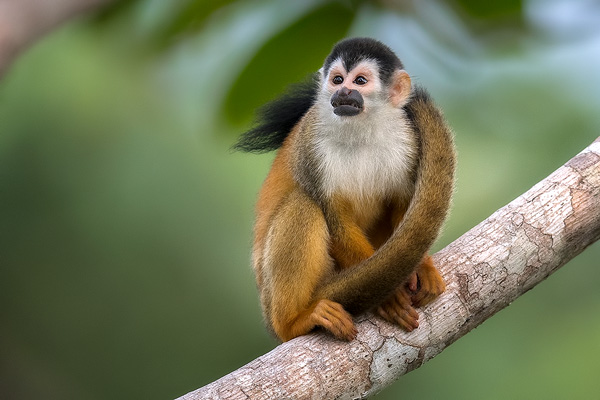
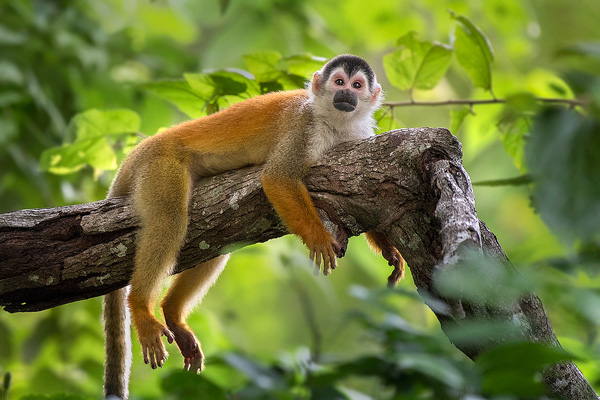
In this first set of photos, the light was getting low, and the monkeys were at a little bit of a distance. I had my D5 and D500, so, to put more pixels on my monkeys, I went with the D500 and 600mm F/4. (It’s better to use a crop camera than to crop full frame camera of lower pixel density – see this post.)
The most significant challenge for these shots was maintaining a fast enough shutter speed to keep things stable on my end, and just as critical, to also freeze their constant action. Even when these guys are sitting still, they tend to be in motion. However, at the same time, the light was low, and even F/4 on my 600mm was struggling to let in enough light.
On top of everything, my ISO was climbing like it could see the summit of Mt. Everest and was about to break a world record.
In the end, I ended up using a shutter speed of 1/250th of a second, VR enabled, and everything mounted on my tripod. The truth is, 1/250th was slower than I really wanted, but there just wasn’t much choice – my lens was already wide open, and I couldn’t bear to watch that ISO climb any higher on my D500 (ISO 2800 ~ 4000 on average). Exposure mode was, as usual, Manual + Auto ISO, and Matrix Metering handled the scene without any need for compensation or override.
So, while I would have liked to capture some of their more animated shenanigans, I knew that at 1/250th all I would get for my trouble was a blurry mess on my memory card. Instead, I decided to work with what I had, so I targeted any monkey that decided to “stop” for a moment (using the word “stop” loosely here).
Using single point, Continuous AF, I would maneuver my AF point so it was right over the eye. As soon as I thought I had a shot, I’d fire away – always keeping my AF active in case they moved a little from shot to shot (which, of course, they did).
Each time a good moment materialized in the viewfinder, I would pop off a short burst at 10 FPS. When faced with low light, slow shutter speeds, or iffy AF (or all the above), I find that bursting in this fashion can often yield more keepers than just popping off shots one by one. In fact, I did an article about that you can read here. More info on this and similar techniques can be found in both of my books.
I was delighted with that first evening and decided that even if I didn’t see another Squirrel Monkey on this trip, that would be OK. I knew I had a couple of nice keepers.
However, the best was yet to come!
A few days later we were along a desolate dirt road when we happened upon another troop!
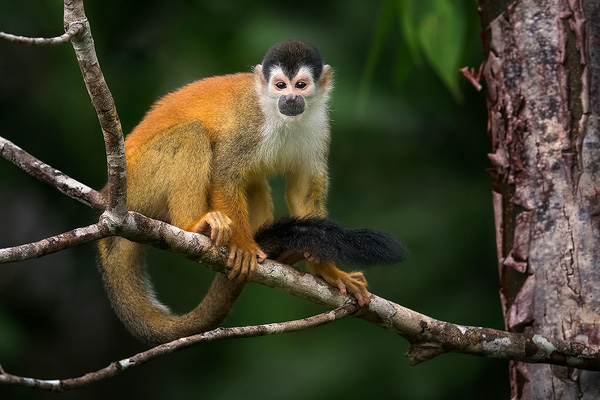
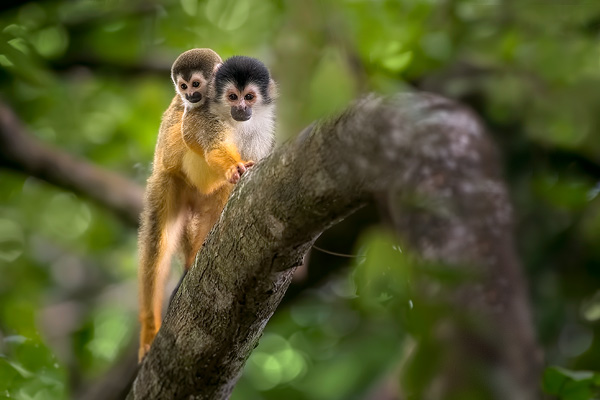
They were really close this time and the light was at least a smidgen better. I started with my 600mm F/4, but quickly realized that was far too much lens for the task at hand. These guys were right on top of us and didn’t seem to mind our presence at all.
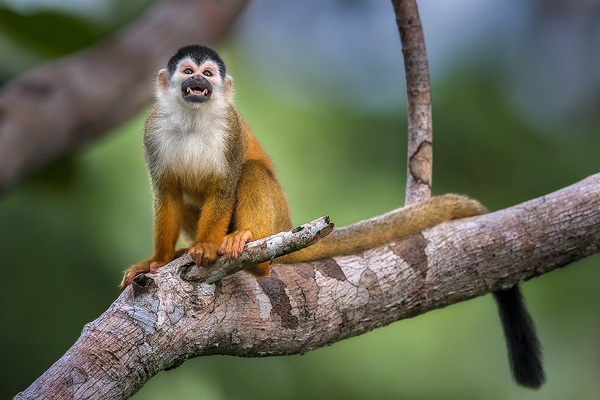
So, I grabbed my 200-500mm instead, stuck it on the D5 this time, opened it to F/5.6, and started poppin’ off shots as they moved through. Oh, and once again, Manual + Auto ISO – although this time at 1/500th of a second (VR on). Still not enough speed to stop all the action, but better than the 1/250th of a second from the other day. My D5 was floating between ISO 3200 ~ 9000 depending on how deep the shadows were.
This area presented a variety of issues, so let’s tackle them one by one.
#1 – Dynamic Range
Dynamic range was a major issue for this location, The trees weren’t overly thick and in many places, the bright overcast sky poked through. This meant the contrast between the shady areas where the monkeys were and the cloudy sky was incredibly harsh. The problem was, if you exposed for the monkey, the background was blown away to a bright, distracting mess. However, meter for the background and you’ll never see detail in the monkey.
A lose-lose scenario if ever there was one.
Plus, although it was slightly brighter in most areas than in the last scenario, it was only by a stop or so better most of the time – and that stop was the difference between F/4 on the 600mm and F/5.6 on the 200-500mm I was currently using. Fortunately, my D5 has better ISO performance than the D500, so I was able to use it at higher values – but still, it was tough.
The biggest problem with higher ISO in this situation wasn’t so much overall noise, but rather the loss of dynamic range.
The thing is, as ISO increases, dynamic range drops. So, that meant it was going to be even tougher to get a workable shot if I ended up with a backlit monkey. In fact, backlit monkeys really weren’t an option at all. Plus, a white sky background tends to pull the eye away from the subject, so not only was it a no-go for exposure, it was also a compositional disaster.
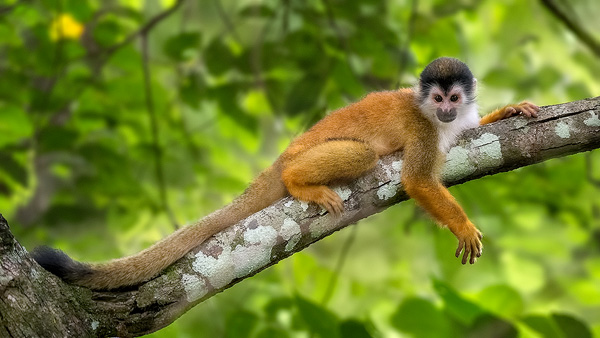
My solution was the same as it always is for animals in trees under these conditions – maneuver around until you can get the animal against vegetation without any sky (or at least, very little sky) in the background. Plus, as a side bonus, as long as I didn’t have too much bright background behind them, the Matrix Meter could handle the job without any help. This allowed me to keep my goldfish-like attention trained on my subjects and my positioning rather than finessing the meter.
#2 Motion
These guys were also in motion, so I needed to think about both the background I wanted and where they were going.
Ideally, you want to be in a position to photograph them as they come to you, rather than chasing from behind. If you walked alongside, by the time you stopped and brought the camera to your eye, you were looking at butt shots through the viewfinder. That may work for Instagram Celebrities, but not for squirrel monkeys.
So, keeping a bit ahead of them was critical.
#3 Obstructions
Finally, in this scenario – and in most scenarios involving trees – I was dealing with vegetation and branches that had an uncanny knack for getting right in the shot during the perfect moment. So, just when you think everything is coming together perfectly, you notice a branch right across the little guy’s face.
The bottom line is that it all came down to maneuverability – as it often does in these types of scenarios. The key was finding a position that had a good background, a good “window of vegetation” to shoot through, and a front or at least side-view of the monkey.
As soon as I saw a good composition through the viewfinder, I shot away as before. Single Point, Continuous Autofocus, AF point right on the eye, and shoot in short bursts. Since the monkeys were really on the move, all of these were hand-held. I love to use my tripod, but when you need rapid changes in height to shoot through little pockets of vegetation – coupled with fast-moving wildlife – you’ll never make it with the sticks. About the only support I would consider using in that scenario is a monopod since there’s only one leg to manage.
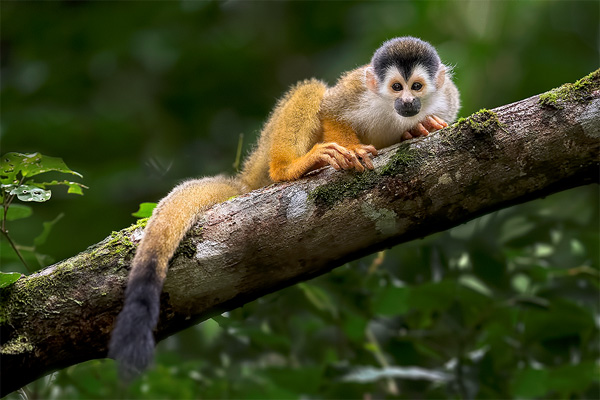
My favorite shots were when the monkeys would stop and rest for a moment on a branch, although even those shots were fleeting. Sure, they appear to be camping out for the day, but the monkeys in this article were in the “rest” position for less than a minute each.
Not every image I captured that day was a winner of course, but I do like the ones I’ve displayed with this post and I actually have even more to process when I get a chance.
All I can say is that even though it’s a challenge, I am looking forward to seeing these little guys again in a few weeks.
Oh, and as always, your comments are welcome.
~Steve
PS…
If you enjoyed this post, I think you’ll REALLY like my e-books, Secrets To Stunning Wildlife Photography and Secrets To The Nikon Autofocus System. They’re filled with hundreds of pages of information just like this. Check it out – click here (hey, it’s free to look 🙂 )


I agree with you Pierre! I have read so many things about the use of VR… For instance, if VR is enabled at inappropriate speed, espacially with high speed, it could result in a “overstabilization” producing a blurred image… at some point and in some particular situations… So I made my own tests: (and I have to tell you that I am using a 500 f/4 G 99% mounted on a sturdy Gitzo! ) Here is what I noticed : (For the test, I was shooting no moving targets, VR doesn’t stop movement) when speed drops under 1/125e I engage… Read more »
You wrote « I ended up using a shutter speed of 1/250th of a second, VR enabled, and everything mounted on my tripod ». I thought that it was not recommended to use VR on a tripod. Did I misunderstand the usage of VR or somthing else? Thanks!
For my own trips a DX and a FX camera worked quite well. For future trips it will be the D500 and D850. The D850 with its 19MP DX crop mode becomes a backup for the D500 in that respect. Curious as to why you took the D5 camera considering the wildlife one encounters in Costa Rica.
Steve, Thanks for the information in this article. I got your book Secrets To Stunning Wildlife Photography and in the process of studying it. I really like the information about shooting with my 810 in DX crop mode instead of the D4. Can you recommend a video of how to set the 810 in the crop mode? I noted a couple of options in the menu and do not understand the difference. I look forward to finishing the book and getting the nest one about the Autofocus System. Thanks for what you do.
Dave
Thanks for another informative lesson and your shots were great. It would be very helpful if you would do a post processing lesson on one of these shots. I’m sure you have developed some unique techniques in photoshop or lightroom that we could benefit from.
Thank you for another great lesson. I particularly like the even lighting. It takes lot of skills and patience to get these great images.
Thank you for another great lesson. It takes lot of patience and skills to get these shots, especially when the subjects are active. Really like the lighting on the monkeys. Well done.
I’m studying your book “Secrets to the Nikon Autofocus System” page by page. I enjoy your pages about “how I got a shot”. On this one you mentioned changing lens from 200-500 mm to 600 mm. Do you use Nikon only lenses? What is you opinion about 150-600 mm Tamron or Sigma?
Yes, I stick with Nikon lenses most of the time. I’ve tried the Tamron 150-600 G2 briefly, and the copy I had was not quite as sharp as my 200-500 (close though). No idea on the sigma, but I’ve heard good things.
Great article adding to your excellent books with real world experience
Love the article. It gave a great insight into AF, composition, how to overcome speed vs fstop. Also the hints of keep ahead of the subject was very good advice
Thanks for another informative and enjoyable article Steve. I also have both your books but like to read these short snapshots of a photo experience. In the comments you refer to shooting with a crop camera vs full frame camera then cropping the photo. I’ve viewed your video on this topic. For me, I don’t have a crop camera and a full frame camera. I have one full frame camera, the D810, which I use with the 200-500mm 5.6 lens for bird photography. I tend to leave the camera set to crop mode to get that extra length and only… Read more »
Hi Gillian –
The quality is the same. In fact, all the camera does is what you can do back on your computer – it just crops. Nothing else. So, if you crop in-camera or back on your computer vs the camera, same exact result.
That said, I still often crop in-camera with DX or – my fav – 1.2X mode. It gives you a deeper buffer, more memory card space, and with the D810 an extra FPS too. I figure, if I’m gonna crop anyway, might as well get some benefit in the field. 🙂
Thank you Steve – once again, a very entertaining and informative article. Like many others I’ve purchased both of your e-books and have found them to be both excellent teaching guides and terrific reference manuals. These new stories are a perfect addendum to those books.
Please, keep them coming – and cheers from Australia!
Thank you!
Love that description of “goldfish-like attention”.,.it sure paid off. Thanks for another very good article.
Thanks 🙂 Oh, and if you don’t believe it, ask my wife 😀
Hi Steve, the remark from Mark Muller pique my interest as well. Is Topaz noise reduction really that much better than LRcc? Really like this approach for learning, also have both books and use them frequently. Dale
I like it because I can use it as a layer in Photoshop and I have more control over the way it works. LR is good, and technically I can use it in PS if I import a copy of the image as a smart object or something, but IMO there’s no reason to with Topaz sitting there 🙂 Topaz often put stuff on sale too – so keep an eye out. 🙂
wondering if active D lighting would be helpful in these scenarios with the large lighting differences?
Active D lighting is, IMO, more of a gimmick that anything else. It underexposes the file to protect the highlights and then pulls up the mid tones and shadow areas. More of a Jpeg tool than anything. In fact, if you use it with RAW only Nikon’s own software will apply it – the files are just “normal” in any other RAW software. Easier to just play with shadow and highlight controls in Lightroom.
I enjoy “How I Got The Shot” series and all your e-books. My question has to do with flash. Did you use fill flash on the Squirrel Monkeys? When using fill flash, what is your set up? Thanks.
Thanks – check out my response to Wendy below, it’ll answer your question I think 🙂
Any role for fill flash in this situation?
I personally don’t like fill flash with mammals and I try to avoid it when I can. Since the sky was white anyway – and I hate a white sky in my background – the only option as far as I was concerned was to get the monkeys with vegetation behind them. Wasn’t too difficult, just had to pick your shots.
Agree. When I used fill flash on birds, they moved every time the flash went off. I personally feel any deviation caused by my actions is a form of harassment. These days I analyze the lighting situation and move around the subject to avoid those difficult lighting situations, i.e. bright sky or background. If that is not possible, enjoy the moment and come back in another time. The most important lesson is to recognize when great lighting situation arrives such as bright overcast days or the “golden hours” and be out there and let the subjects come to you. If… Read more »
Steve— you mention that the dynamic range drops as the iso increases. I shoot with the D500 and D850 and it would be informative if you would expand on this. I’m betting this will be covered in your Exposure book which I look forward to reading. I can’t say enough good things about your book on Nikon’s focusing system.
Yup, it’s in the new book for sure. The super-basic explanation is that dynamic range is based on the acceptable noise floor of an image. As you increase ISO, you get more noise due to less signal. As that noise goes up, the shadow areas suffer and shadow detail that was acceptable at a lower ISO is not longer usable at a higher ISO.
Great how you’ve explained what was required to capture the monkey business. And in real time, you have got to be thinking faster than the action, so good on you for that and being able to explain the process to us all so well, here.
Thanks!
I have one of your books, and it’s great, but I really really love the “How I Got the Shot” series. The book is a great reference but these articles are easier to read. I can mentally see myself in that situation and compare to what you are doing.
Thanks and please keep it going!
Will do – and thanks! I am actually back to thinking about doing an entire book of them down the road – but way down the road.
Love both the technical info and the ‘story’ behind the shots. Thanks.
Thanks for the kind words 🙂
If you someday put one of these monkeys in your bag put an extra one for me.:):)
I can understand a tripod being a problem in dense woods but how about a monopod? This would be better than handheld.
Your experience is making me think twice about getting a teleconverter for my telephoto lens in that I would lose another f-stop. Seems like you had your hands full without having to worry about working with a f8 lens.
Thanks – under point #3, I do mention that I use would use a monopod if needed. Only one leg to adjust is way better than three. 🙂
Oh, and yeah, F/8 would be tough!
Steve,
Good information, I wish I had it when I was in Costa Rica a few years back. Let me know about your 2019 schedule I would love to attend your next Costa Rica workshop.
Will do! Honestly, what’s in this article is only a tiny fraction of what the participants in the workshop will learn.
Thank you for “How I Got The Shot…Costa Rica Squirrel Monkeys”. I wish I had this information when I was photographing Green Monkeys in Barbados! I hope you keep writing these extraordinary descriptions! I attended your presentation at Cuyahoga Valley National Park a couple of years ago and purchased your Nikon Auto Focus book and study it often! Thank you!
Thanks for the kind words 🙂 More on the way.
These are outstanding photos, as I have come to expect from you. I really appreciate these “How I Got the Shot” posts of yours too. Even though I shoot Canon I have learned a great deal from you as your tips and techniques are applicable to both Canon and Nikon. Please keep these “tutorials” coming!
Will do 🙂 And thanks!
Great stuff…always enjoy learning how you photograph animals. Question though…your shutter speed was only 1/250 or 500…and your ISO ended up being sooo high. How are your shots so crisp and focused. How far away were you on the 2nd day (when you said they were on top of you). I shoot exactly as you noted in article and I am trying to get better resolution/crisp/clear shots….even if my ISO goes up (D850/300mm2.8/auto ISO/manual/matrix/C/single pt/monopod in jeep). Are there any other tips? Anything else (pre-edits) I can work on or be aware of. I have bought and devoured your AF… Read more »
Thanks 🙂 Keep in mind that ISO doesn’t affect sharpness exactly. If the image is crisply focused, then noise isn’t as big a factor as many people think it is. It’s when you use high ISO and miss critical focus a little that it becomes a problem. Spot-on focus is the key when shooting high ISO. After that, careful use of noise reduction software like Topaz Denoise. The key there is not to get rid of all the noise, just enough so that it’s not offensive anymore. And practice helps too – I’ve been doing this a loooonnnngg time and… Read more »
Steve
I have the same question as Michelle, and have devoured both your books.
I have the D500 with 200-500mm lens, and shoot single point AF on the eye, continuous AF, matrix metering, and Auto ISO. On overcast low-light days and birds I have faster shutter speed and high ISO and end up with lots of background noise.
Great comment about distinguishing between being in focus vs noise. I definitely have to work on focus!
Question: do you think Lightroom is sufficient for noise reduction, or is Topaz really that much better?
Correcting my email address…
Really liking these “How I got the Shot” segments.
Thanks 🙂
Real nice and good tips
Thank you!
Real nice shots. Love the bokeh. I’ve found no matter the best efforts, the post will notch it up or down. What program do you use in post, and which camera profile in editing? Thakns
I start with Lightroom, often just using the Adobe Standard or Camera Neutral profile. From there, off to Photoshop. I can do most of what I do in LR, but I’ve been using PS forever and just prefer it.
Entertaining and informative, thanks!
Thanks!