
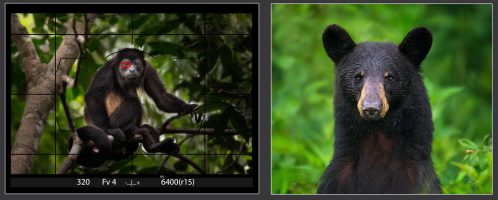
At one time or another, every wildlife photographer will face a low-light scene with ISOs that are through the roof.
Wanna know how the pros handle it?
In this video, I’ll share some techniques I use in that situation to help get lower ISO shots of my targets. Check it out – the techniques in this video have saved the day for me more times than I can count!
PS – If you enjoyed this post, I think you’ll REALLY like my e-books and video workshops! Thousands of pages and hours of videos filled with tips, tricks, and techniques – all my best content! Check ’em out – click here (hey, it’s free to look).

Yes, I agree with him. This is a great ISO secret for Photography.
nice complement to your ebook..Helps clarify your description in the book. Thanks a lot. Bob
Hi Steve, enjoying the videos (& I have some of your ebooks) – I’m a bit more of a video fan than reading only, Actually my favourite is face-to-face teaching but as I’m in the UK, sadly you don’t seem to do that. So this is helping me assimilate the tips better. I’m guessing from this that whilst you are in Manual you are using Manual ISO? I have seen videos (Nikon themselves) that using Auto ISO can help if you are going for birds in flight. What are your thoughts? Will try this out for ‘static’ birds. I have… Read more »
Great suggestion on getting sharp images by the lowering of shutter speed(s). Thanks. Looking forward to putting it to the test.
I watched your secret ISO technique video yesterday and put it to use this morning out in the backyard. It was poor light and raining. I got some keeper shots at 1/100th shutter speed which I did not think would be possible. Check out this clean scrub jay shot I managed (note the smeary raindrop movement) using a monopod with a 200-500 lens. A great big thank you for this technique that I would not have tried on my own. You have never steered me wrong!
Awesome shot! One cool thing about slower shutter speeds in the rain is the drops are longer 🙂
Thanks for the video. If importing into LightRoom do you suggest in ticking not to import duplicates. As you take longer bursts many will look the same. I just need a Tazer to keep the critter still long enough to change the settings
“Unticking” not “in ticking”. Predictive text
That’s not how it works 🙂 LR doesn’t look at the image to avoid duplicates, but things like the file name, time, etc.
I believe you failed to mention that you’re using auto ISO. Right?
You can do it either way. While I typically use M + Auto ISO (so all I have to do is change the shutter speed), I’ve done it with full manual mode. You just have to change both settings as you adjust.
Very good advice as always. I really like the idea of starting in a relatively safe place for a sharp shot with maybe some noise to a blurry one.
This might be a bit off the wall but could you shot a burst at the higher ISO and then process a couple of the shots as HDR in Lightroom? That’s a way to get rid of noise in landscape work.
It’s an interesting thought – astro photographers stack multiple images to reduce noise. You’d have to be rock solid on the tripod, but I might try your idea when the opportunity presents itself. It’s an interesting thought.
Lightroom Photo Merge > HDR includes the option for Auto Align which might help a bit. Would be interesting if Focus Stacking (with no focus shift) would help as well.
Stacking for noise reduction is usually a photoshop thing – it’s not HDR or focus stacking. I think you have to stack the layers using a smart object and Median or Average for stacking (once they are aligned). I have to say, I’m a bit intrigued by the possibilities with this, so I’ll likely give it a try and if it works, I’ll put out a video showing the process 🙂
I use Helicon Focus which runs in Lightroom as a plug-in via Export. It returns a DNG Raw file just like the Lightroom Photo Merge functions do. This would be more about dealing with camera motion blur than getting rid of noise.
Focus stacking won’t help with motion blur though.
You would know! Thanks.
Hi Steve good tip, very logical, but I remember either reading or seeing this 2 yrs ago from you 🙂 I always use this tip, and pass it on to others when possible. But these days with Topaz AI, DXO Pure Raw, ISO 6400 is not much of a problem,especially if I can fill the frame .
Yeah, I had it as an article, but thought I’d turn it into a video and add the part with the self-timer and rear LCD (although that trick is in some of my books too LOL).