
I know what you’re thinking, “What the heck – is Steve trying to peddle some kind of ‘photo insurance’ now”?
Not so much, but I didn’t really know how else to describe what I’m about to explain 🙂
So, let’s dive in – what do I mean by ISO Insurance?
Probably the easiest way to explain it is to grab a crayon and draw an analogy.
You know how when you’re trolling along for wildlife and off in the distance you spot a relatively rare critter with a reputation for skittishness? How do most experienced wildlife photographers handle the situation?
Exactly – they take a distant shot as “insurance” in case their jittery subject decides to flee.
Then what?
Yup, they move up a little, take another “insurance shot” and repeat the process until they are either at the range they wanted in the first place or the animal wanders off in search of more secluded pastures. In the process, there are some more distant images that are destined to help to fill up the trash bin in favor of the closer ones. The benefit of course is that you capture closer and closer shots with each successive move.
ISO insurance is a little like that.
Often, when faced with a subject in low light, we still want to be at a “safe” shutter speed for arresting our own movement. Sometimes we’re hand-holding, other times we’re a monopod, and still other times we’re using a tripod with a loose gimbal or ball head.
And for every support setup you use, there’s typically a “safe” shutter speed that will net you consistently sharp images with very little chance of motion blur introduced from your photographic technique.
However, when the light is low and demanding a higher ISO than you really want, it may be time to take out an ISO insurance policy.
Here’s how I do it.
First, even if it requires a high ISO, I take a series of images at my “safe” shutter speed so I know I have the shot. I’ll even take a (quick) moment to chimp afterward to make sure I have a few completely sharp images written to the card. Then, I’ll take a series of shots at progressively lower and lower ISOs (by dropping the shutter speed – I’m assuming in these conditions you probably have the lens wide open 🙂 ) until I just can’t keep the motion blur away anymore.
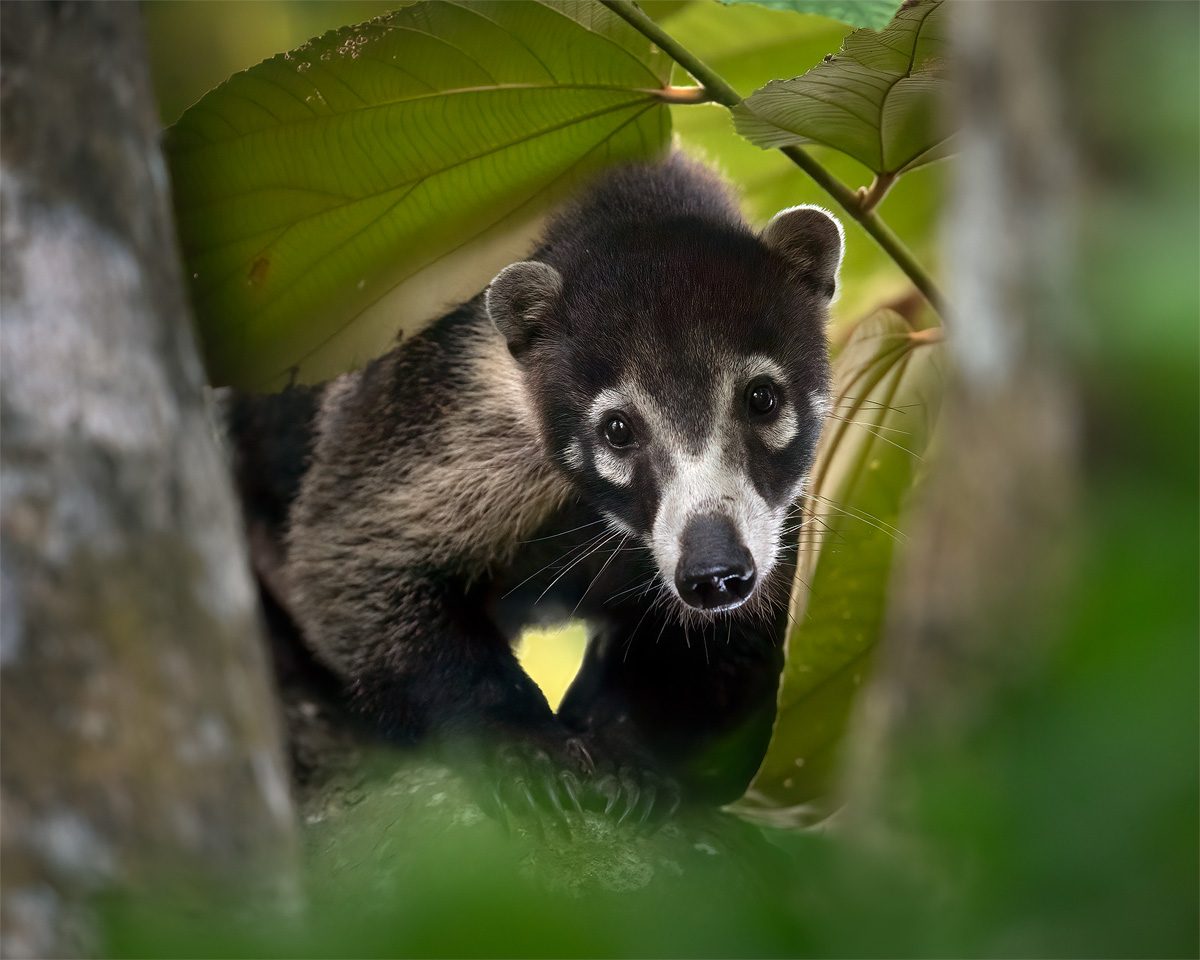
For example, let’s say I’m in the rainforests of Costa Rica (where I am as I write this). Rainforests are no stranger to high ISOs. We’ll also say for the sake of this example (and to stick with even numbers) that my “safe” shutter speed with my 600 F/4 on a loose gimbal head / monopod is 1/500th (see this video for why I like a gimbal head on a monopod).
So, we’ll say I run across a more or less stationary subject that’s fairly patient (hey, it happens more than you’d think). I have 1/500th dialed in but my ISO is at 6400 – ouch. Still, I’ll shoot a quick series or two just so I know I have a sharp photo – and in case the critter runs or flies off. After all, I can fix a noisy image, I can’t save a blurry one.
Of course, I can shoot lower than 1/500th and get plenty of sharp images, but I know if I’m at 1/500th or faster, there’s virtually zero chance of having an image ruined due to motion blur on my part. It’s my “safe” speed.
Once I’m certain (or fairly certain) I have my shot, I’ll try again, but this time one stop slower – 1/250th. This drops my ISO to a more agreeable value of 3200. I’ll pop off another series, probably shooting more than usual since I know my failure rate is likely going to be higher (see this article for why bursting helps). Sure, I’ll have quite a few throwaways that show minor motion blur, but I’ll also likely have a few keepers in there as well.
At this point if the animal hasn’t tired of my shenanigans, I’ll probably drop another notch down to 1/125th of a second and repeat. This time, enjoying the relatively lower ISO of 1600.
If I check and none of the images are sharp, then I’d probably head back up to 1/250th and continue to shoot (if the animal was still willing of course). However, if I still see a handful of sharp images at 1/125th, I’d probably drop to 1/60th and be down to ISO 800. At this point, I’m pretty far below my “safe” speed of 1/500th, but I also have been taking insurance shots along the way. I know I have some great images at ISO 1600 and 1/125th, so I have every little to lose by going down another notch and at least trying.
Of course, I could have just dropped to 1/60th right off the bat and tried it, but if it turns out 1/60th was far too slow, then I’m stuck with the higher ISO 6400 shots. (By the way, this is a great reason to shoot M + Auto ISO – it allows you to very rapidly change your shutter speeds – see this post for more info.)
However, by dropping incrementally a stop at a time, I can go as low as possible and get the lowest possible ISO I can use under the circumstances. Sometimes maybe it really was ISO 6400, but using this technique I’ve often found I can still net a sharp image or two even at surprisingly low shutter speeds.
Of course, this isn’t for every subject. A fast moving subject demands an appropriate shutter speed and usually dropping shutter speeds and lowering ISO has a far lower success rate (although, sometimes you get lucky).
This also only works when you have a relatively stationary animal that’s being somewhat cooperative. I know that doesn’t always happen, but when it does, you can take advantage using this technique.
This little trick also runs the risk of the animal doing something really cool with you not capturing the shot due to your lower shutter speed (either because of your movement or the critter’s).
So, use with caution, but remember to try lower and lower shutter speeds once you have your safe “ISO insurance shots” for static subjects.
Editing Tip – when sorting your photos after using this method, make sure you start at the end of the series instead of the beginning. That way, you won’t be tempted to stop sorting at a noise image once you find one you like. Start with the low ISO stuff and only use the higher ISO images if you can’t find a sharp one at the lower ISO settings.
Finally, remember to check out my Noise Reduction Video Workshop if you find yourself stuck with a high ISO image you need to clean up. 🙂
~Steve
PS – If you enjoyed this post, I think you’ll REALLY like my e-books and video workshops! Thousands of pages and hours of videos filled with tips, tricks, and techniques – all my best content! Check ’em out – click here (hey, it’s free to look).
Hi Steve Enjoying your blog and great help and info. I am in the UK and recently started using D850 and 200/500, weather generally cloudy and dull! and subjects smallish in frame , hard here to get very close. and I just can’t get my images free of noise over the whole image unless its Florida style weather and the subjects are big and close. Is the only way to improve things to buy a 500 f4 or other top end lens. I keep shutter as high as possible but even past 1600 iso things seem to get worse. Be… Read more »
Camera makers should put in a feature to judge the amount of camera shake via sensors and automatically lower the shutter speed for you (keeping in mind the focal length and pixel size). Combined with image stabilization and IBIS, this would be a killer feature..
Thanks Steve. Another great tip as always. Planning a trip to Costa Rica in Feb. and can’t wait.
Love to hear what regions you visited–pacific, rainforest or atlantic–any why.
Thanks Steve,always enjoy your tips.
That’s all very well, Steve, when you have near stationary objects, but how would you cope with a fast action sports event – you don’t get second chances.
You’re just stuck, unfortunately. No magic bullet – if you need a faster shutter speed, you can only get it via ISO or a faster lens.
Thank you Steve – great tips!
Thank you, Steve. I’m heading to Cali, Colombia in a month so hope to try and put my education to the test.
Thanks for another helpful lesson, Steve! Makes so much sense, looking forward to trying it.
Good point. I just sold my D750, which was an ISO leader for the money. I got the Z 6 and more than doubled my ISO capability, plus you see the noise in the viewfinder, less trial and error. The wide mount Z lenses do not need to be stopped down for sharpness. A game changer. I’m waiting for longer Z line lenses. My Sigma 120-400mm lens does not autofocus with the wonderful FTZ adapter.
Great article as always Steve! Been following you for years and have many of your E-Books, just as fabulous! I have a question for you: I have been a Nikon amateur shooter for years, especially travel and landscape, people photography. I started with the D7000, then moved up to the D810. Shortly after the D850 came out have since heard so much about their mirrorless lineup and Sony’s in comparison. I realize Sony is fairly new in the game and from some pros have heard poor dealings when you have a problem with them. I know Nikon is the oldest… Read more »
Thanks for the kinds words 🙂 To answer your question, we just purchased a Sony A7R4, a 100-400, and just the other day a 200-600. This is mostly my wife’s kit, but when the A9II we have on order comes in, there could be a change in my bag 🙂 The thing is, if there’s one thing the Z series tough me it’s that I like mirrorless better than the DSLR form factor. Too many advantages to ignore – however, Nikon isn’t even close to Sony at this point, at least not from a sheer speed / performance standpoint. However,… Read more »
Another good trick to play with! I now always find myself taking pictures commenting to myself : Steve would do like this… Steve would use this method…!! 😉
Looking forward to reading next tips, many thanks and enjoy CR trip
Steve great information. i”ll start trying that when able.
Steve,
Great article. Thanks for this info.
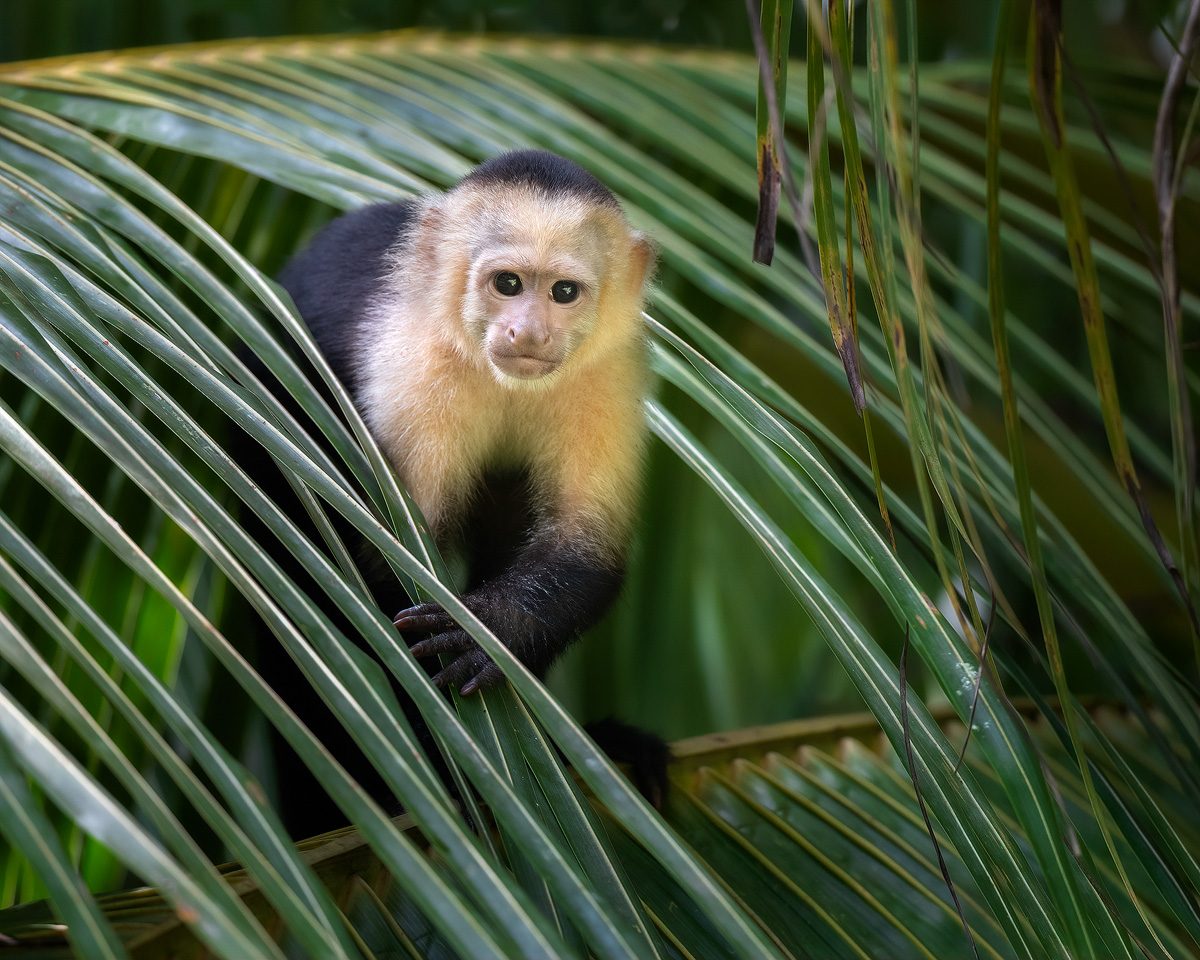
Steve, your White nosed Coati shot is beautiful and at ISO 7200! Amazing!
Thanks Steve! That’s an excellent action plan. For any Sony shooters out there (I use an A7rIII), one alternative way to implement this philosophy – aside from M control of shutter speed and Auto ISO, of course – is to set the lens button to Auto ISO Min SS. I usually try “Faster” in good light (i.e. shutter speed is 4x focal length until upper ISO limit is reached), and with this button on the lens I can very quickly change down to “Fast” (2x focal length), Standard (1x focal length), and so forth, for ‘ISO Insurance’. I normally use… Read more »
Great idea! We just start shooting Sony along with Nikon and I’ll have to give it a look.
A always, another great video Steve
Im pretty much always Auto ISO, chasing shutter speed and wide open
FWIW, I always start off auto ISO, get the shot, then try for a lower ISO shot at that stage, (If I remember! :))
…………..Gary
I know this is a little off-topic. A working ISO question. Let say I’m positioned to shoot a bird. My current ISO is 200, f8 and my shutter speed is 400 on a 400mm lens and I have a working ISO of 1200. Is there any reason not to bump up my shutter speed higher as long as I am at or below my working ISO? I understand that higher ISO = noise but it is my understanding that Working ISO you can shoot with little or no noise for normal-sized prints. with erratic moving subjects, I can’t help but… Read more »
Not sure what you mean by “working ISO” – ISO is ISO, and even if you find 1200 acceptable, if you can use a lower ISO, you get cleaner results with better DoF. HOWEVER (and this is the big one), you do need to balance it with shutter speed. If I could shoot at ISO 1200 and easily be at my “safe” speed for a given subject, I probably would. I’d rather have the higher keeper rate than to play with ISO unnecessarily. I typically only use the technique in the article when I really need to. For example, I… Read more »
A photographer in Yellowstone once told me about (Working ISO) Set your camera on a tripod with a static subject at say F8. Set your ISO at 64 take a shot then up to 100 ISO take a shot ………. Iso 6400. With all your photos open them up and compare the grain. As we all know the Higher the ISO the more grain. So looking at your photos go to the highest ISO that you could use were noise is just starting to be a problem and then back one. At the time I had a Nikon D800 and… Read more »
Steve thanks again for posting this…
All your newsletters and videos have been so helpful I really appreciate it
Thanks Steve, Alway very informative, and I learn a lot. I have purchased Your ebooks, and All of them have helped me a lot.
I am an Amateur “old man of age 79” who attempts to take Local Youth Middle School & High School Sports as a Hobby. And Your ebooks on AF Focus, etc., have really help me improve the number of saves.
Tom Mewborn
Trinity, Fla.
Tom Mewborn,my daughter lived in Trinity and I lived in Palm Harbor. We both moved to Georgia about a year and a half ago . I like this guy, he gives great tips.
Neat, Pleased to meet You. I was born in Rome, Ga. Was in the Navy in the late 1950’s as a Weather Guesser. I got station in Miami, Fla with the Fleet Hurricane Forecast Facility. Met this beautiful girl got married raised three kids in Miami. Our Daughter went to College at USF started teaching school in Pasco County. When Grand Babies came We move up to be near them, and out of the big city. And Yes, I love Steve’s work, his Video’s, ebooks, his follow up tips like this one on working with iso, etc. I know he… Read more »
Informative and transparent discussion. Thanks
Thanks for this, we will be in Costa Rica in a couple of weeks and will be putting this to the test!
What does “chimp” mean?
Looking at the back of the screen quickly to check focus, exposure, etc.
Yup, what Chris said 🙂
Great post Steve. Thanks. Re: “I’m assuming in these conditions you probably have the lens wide open.” What about lenses that aren’t sharp wide open? My Sigma 150-600mm Sport needs to be stopped down to f/8 at 600mm for maximum sharpness.
I think you just answered your own question
Very tolerable writing. It is interesting and to the point. I don’t like it when a writer seems to have children in mind as an audience.
WOW
‘Tolerable’? Eeeek!
I mean winning the lottery kind of tolerable.
Great tip that I that I will look forward to trying. Thank you again for all your useful advice.
Great explanation . . . but I wonder, why “Since this was my D850, I like to keep the ISO down a bit more”. I thought the D850 was fine at higher ISOs . . .
It’s OK at higher ISOs, but it’s no D5, so I try to keep it as low as possible. In general, just because any given camera is good at high ISOs, doesn’t mean you should shoot at those higher ISOs if you can avoid it. You always get better results at lower ISOs and I see a noticeable difference with the D850.
Steve, thanks for another practical tip. I have used this technique but not as methodically as you outline. As usual your little gems of advice made lots of sense and I especially said an “oh yeah” when you advised to review the image series from last to first (lowest to highest ISO).. That one will speed up my culling process. Best wishes!
Great Tips, Thanks
Thanks, great tip. Question about auto-ISO. When shooting M + auto-ISO, what metering pattern do you use? Spot or matrix? I normally shoot spot when in manual, but not sure that would be correct using auto-ISO.
Hi Steve –
Doesn’t matter – just use the same metering pattern you would use with any other mode. Works the same.
Thank you Steve, this technique will be very useful.
Great article Steve thanks! Your low shutter speed photo technique/abilities are Jedi like!!
I’ve been able to get down to 1/300 th on the 500PF hand held..Nikon VR is excellent!
I’ve done 1/60th on tripod with the 600 – still haven’t tried the mono pod, it’s so wiggly?
I’ll keep working on it ..
Thanks for the inspiration!!!
I’ll take your advise as that of a wise man. Getting wise takes a lot of mistakes. And learning from them.
Hey Steve
Thanks a lot for sharing this handy technique. Enjoy your time in Costa Rica.
Regards
Tobias
Thanks very much Steve. Fantastic advice.
Most of my shots are in poor light, so this will be invaluable.
Great tips, thanks!
Thanks Steve, good advice as usual.