 Like most landscape photographers, I look forward to amazing clouds at sunset. There’s just nothing quite like a dramatic sky and a successful image to close out the day.
On the other hand, there’s nothing quite as discouraging as facing a bland, barren sky as the sun slides towards the horizon. Or at least that’s the way I used to think…
Everything changed one crystal clear night in the backcountry of Northern Michigan. I had been plagued by a week of cloudless sunsets and out of sheer frustration to get something on the memory card, I finally decided to attempt some star trails.
That did it – I was hooked. Little did I know star trails were the gateway drug for nighttime landscape photography!
However, it didn’t take long to figure out that star trails can get tedious if they are the centerpiece of EVERY nighttime shot you make. (A conclusion arrived at, in part, by my family grumbling, “Seriously, star trails AGAIN??”)
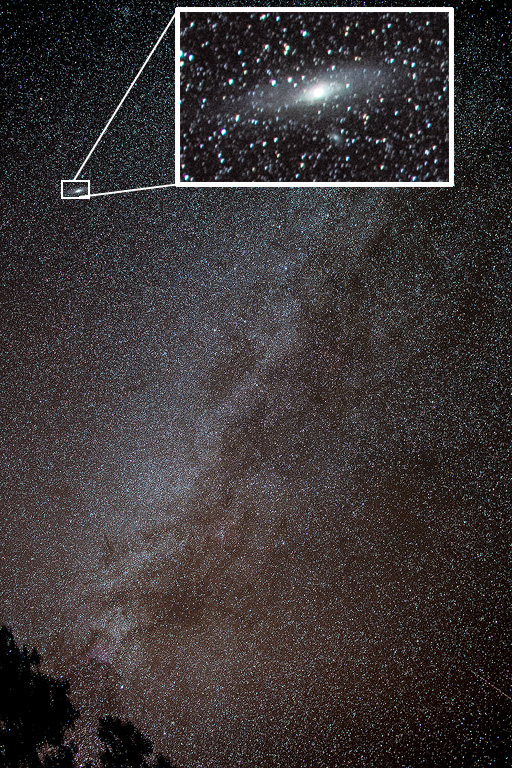
I came to a point where I wanted to capture the night sky the way I saw it – without trails and maybe with the long arm of the Milky Way reaching through the frame.
I started without the aid of a tracking device but quickly discovered the stars would trail ruthlessly on my 24MP Nikon D3x – and the high ISO wasn’t so hot either. I soon graduated to a D800, but its tightly packed pixels happily showed trails for any exposure over 20 seconds – even with wider lenses.
On top of that, I really wanted to keep the ISO to 1600 or less. Many of my clients purchase large prints, and heavy noise just wasn’t an option.
Even more importantly, I also wanted to gather more luminance from the night sky. I envisioned crisp stars normally invisible to the naked eye making appearances in my frame, as well as galaxies and even an occasional nebula from time to time.
Sure, some stellar phenomena might be tiny in the final photo, but I wanted the viewer to “discover” them when they were viewing a large print.
So, I did a little research and decided I needed a tracking device of some sort. Options varied wildly from expensive mounts for telescopes to DIY kits that could (allegedly) be put together for lunch money.
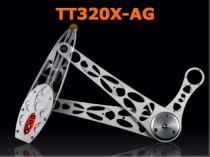
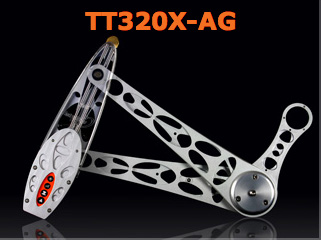
Then I stumbled upon the Astro Trac TT320X-AG. While it isn’t cheap, (coming in at just over $700) it seemed easy to setup and it was designed specifically for photography.
Before long, I was the proud owner of the following kit:
Astro Trac TT320X-AG
Astro Trac Illuminated Polar Scope
Astro Trac 12v car adapter
Astro Trac 12v “AA” Battery Pack
If you decide to purchase one of these for yourself be sure to get all the accessories listed above. I discovered some companies sell them separately and you really need everything listed to pull this off (except for maybe the 12v car adapter which, ironically, was the only accessory that was included with my Astro Trac.)
The unit itself is built really well and much more robust than I expected. When I ordered it I anticipated a frail device that would need significant cushioning every step of the way. And though I’d hesitate to let it bounce around in my truck and I certainly wouldn’t want to drop it, I’m very impressed with the overall build quality.
Using the Astro Trac was surprisingly easy. Initially I was intimated by all the talk of proper polar alignment, adjusting azimuth and altitude, but it’s actually pretty simple as long as you have a rudimentary knowledge of the night sky.
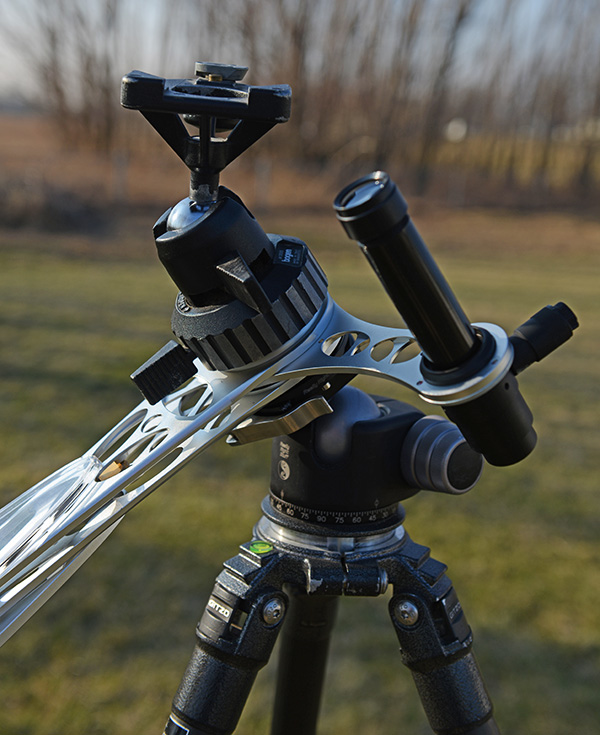
The first challenge was mounting the thing to my tripod – Here’s that setup in detail.
First, keep in mind that with the entire rig put together and a camera perched on top, it’s not exactly a featherweight. I highly recommend starting with a very solid tripod paired with a very sturdy ball head (if your ball head “drifts” under load this will NOT work). I use a Gitzo 3 series and a Really Right Stuff BH-55 Ball Head.
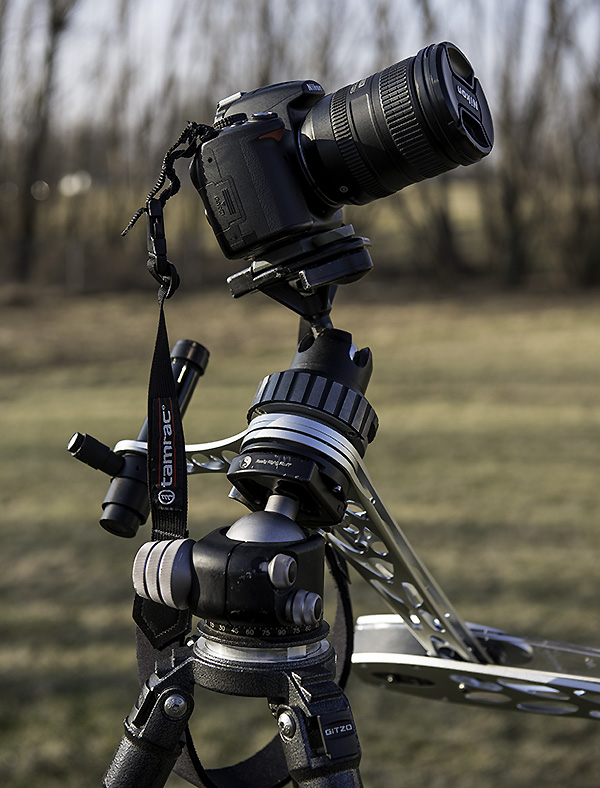
(Note on the ball head – I think if you happen to have a dedicated tripod for this, mounting the Astro Trac to a pan head or geared head would make alignment a much easier proposition. I just don’t want to carry yet another tripod when I travel!)
I also wanted the ability to quickly mount the Astro Trac to my tripod head, so I needed some sort of quick release that would fit the 3/8” socket on the unit. The folks at RRS had a solution – a TH-DVTL-55 quick release plate.
That’s when I came across the first problem. The Astro Trac is a narrow device and the screw that comes with the RRS plate is just a bit too long, bottoming out before the plate is tight. A large washer was all it took to save the day.
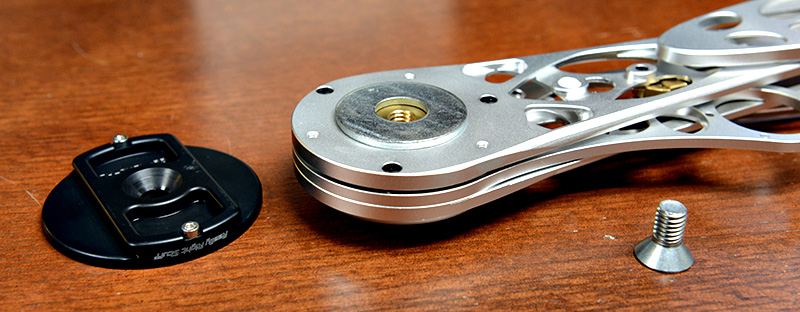
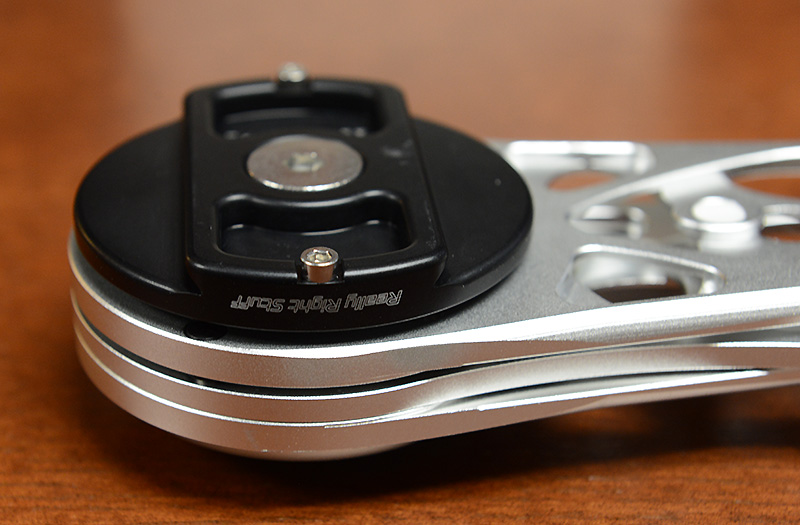
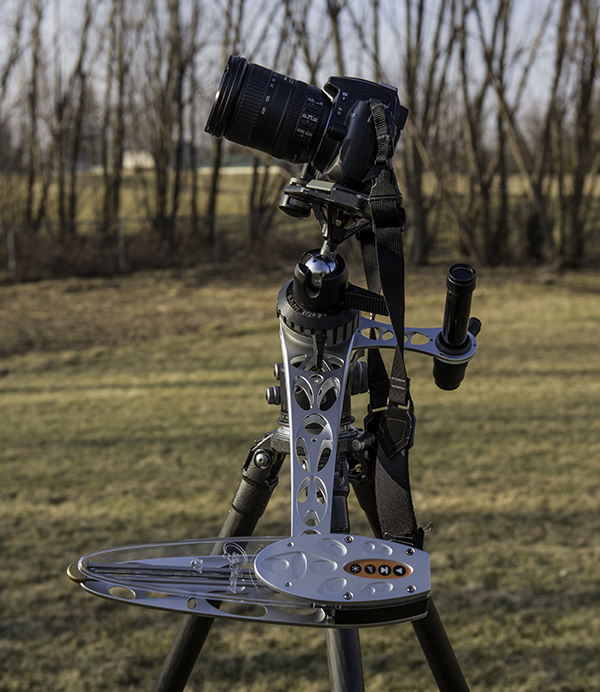
The next glaring problem is that you actually need a way to mount the camera to the rig, now that your tripod head is being used to support the Astro Trac.
My solution was a retired – but good quality – ball head that had been collecting dust in my closet. I mounted this to the Astro Trac then the quick release to the camera so my setup looks like this:
Once you’re to this point, it’s time to get ready to shoot!
I recommend waiting until at least an hour and a half after sunset before you begin. I quickly discovered when I first started doing stars that just because you can see them doesn’t mean it’s dark enough for long exposures. I’ve had the sky blow out to completely white on some “impatient” evenings when I thought it was dark enough.
Next, you need to do a polar alignment. In the simplest terms, this just means pointing the Astro Track squarely at Polaris, the North Star. The instructions go into great detail about the procedure, so I’ll just note some highlights and pitfalls below.
To get started I recommend sort of “squaring up” the Astro Trac so it’s pointing roughly north and angled toward Polaris. I also suggest doing your alignment without the extra weight of the camera on the rig.
Mount the scope to the Astro Trac, noting that it comes in from the bottom, and that it’s VERY susceptible to falling out. The magnetic base is just enough to hold it, but no more. Mine has already hit the ground a time or two, so now I remove it after I get everything aligned. It’s just too easy to bump it unintentionally in the dark. (I might assemble some sort of “safety line” for it down the road.)
At one point in the procedure you’ll need to get Polaris into a little “notch” in the scope. I found that it helps to start by spotting along the top of the scope to make sure you’re in the astronomical ballpark. Also, I found it helpful to turn down the illumination a bit once I start using the scope to actually align the unit (can’t see the stars with it turned all the way up).
The closer you get Polaris to that notch, the better the tracking.
In my experience (shooting wide angle with 4 – 8 minute exposures) as long as I was close to the notch I was getting acceptable tracking. The longer your exposure and focal length, the more accurate you need to be with your placement. There’s a “fine tuning” section in the instruction manual to help.
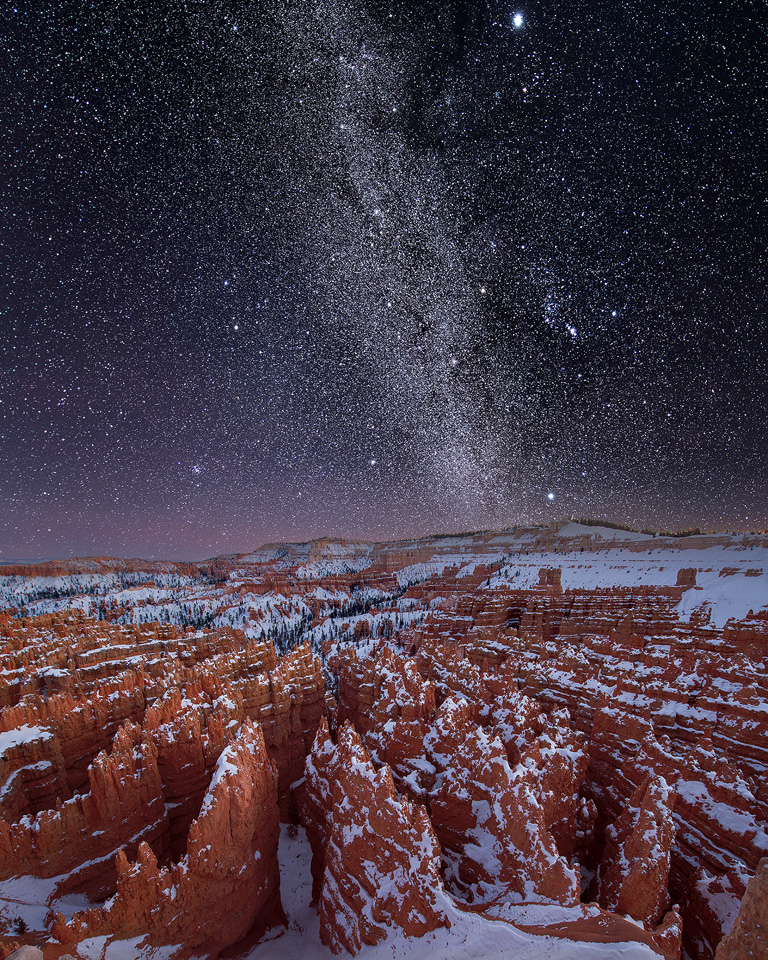
Once everything is set, carefully mount the camera to the rig (if you bump the tripod, you get to start over – a lesson I learned the hard way one 20 degree below zero night at Bryce Canyon!)
From there, it’s time to experiment. I like to start with a high ISO shot (6400) for 30 seconds just to make sure the stars are sharp and I’m getting what I want in the frame (one of the first things you learn with astrophotography is that composition at night can be a bit tricky when your viewfinder is pitch black).
Once I’m happy with my test shot, I lower the ISO to 1600 and shoot for about 4 minutes at F/2.8. Of course, you can experiment with different combos until you get the look you’re after. Some areas of the sky seem to need longer exposures than others.
Keep in mind that your exposure can render a fairly bright image, so be sure you aren’t actually blowing out areas of the night sky (like nebulas). The horizon can be especially troublesome if you’re near a populated area.
Oh, and get ready to grin. When you glance at your LCD and see the sheer volume of stars and celestial detail this rig can capture it will literally blow you away! I remember just standing there with my jaw gaping over the first image – I couldn’t believe what I was seeing! Crisp stars, nebulas, and even galaxies were all right there. Pretty amazing.
Here are a couple samples from my first night experimenting with the Astro Trac (the second one had better Polar alignment than the first). These are just quickly processed in Lightroom with not much adjustment beyond a blackpoint and a little contrast. Note that I have not done any real color correction or noise reduction in these images. Both at ISO 1600, F/2.8. The first is around 4 minutes, the second a half stop longer at 6 minutes.

Once back on the computer, I pull the exposure back and / or set a black point. This gives a more realistic version of the sky plus lowers the noise level quite a bit.
While out in the field you might also consider shooting a “dark frame” or two while you’re there to help reduce noise. I’ve not done a lot of dark frame subtraction, so I’ll let you Google that one. (Hint – a free program called “Deep Sky Stacker” can help a lot.)
That said, even at ISO 1600 once I pulled the exposure down I was very happy with the noise level – no dark frames required. (Note: I’ve also been shooting in winter where noise from excess heat isn’t a big problem, your warm summer shootin’ mileage may vary.)
As a final caution, keep in mind that the camera is moving during the exposure, so the ground and anything anchored to it is going to end up blurry. If you’re trying to include a landscape with the stars you’ll have to shoot it separately.
I personally use twilight or moonlight (or both) for the “landscape” portion of the shot, and then blend the stars and the land together in Photoshop. That’s what I did for my first “real” photo using the Astro Track:
Overall, I’m thoroughly enjoying the Astro Trac setup and I’m anxious to get out and use it at more locations. In fact, I think it’s safe to say that a clear sky at sunset is a welcome site for me now!
PS…
If you enjoyed this article, I think you’ll REALLY like my e-books, Secrets To Stunning Wildlife Photography and Secrets To The Nikon Autofocus System. They’re filled with hundreds of pages of information just like this. Check it out – click here (hey, it’s free to look 🙂 )